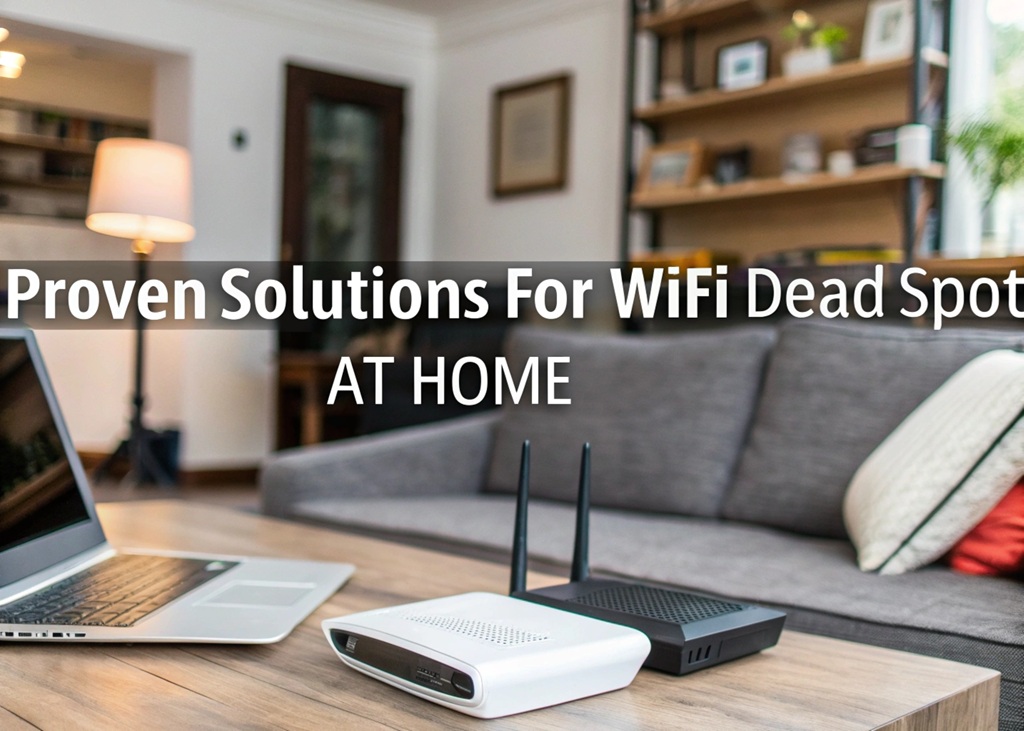
Beat the Buffer: Proven Solutions for WiFi Dead Spots at Home
We’ve all been there—trying to join an important Zoom call or stream a favorite show, only for the WiFi signal to vanish. It’s beyond frustrating when your devices work perfectly in one room and lag in another. These WiFi dead spots, or areas in your home where the signal is weak or nonexistent, can seriously affect your online life.
In my home office, I faced this exact problem. Despite having a solid internet plan, the back bedroom had zero signal. I tried moving my router, even switching providers. Nothing helped—until I did the research and found real fixes. That experience inspired me to share these actionable tips.
If you’re experiencing these same headaches, don’t worry. There are simple, practical ways to fix WiFi dead zones. Whether it’s a better router, adding a mesh system, or upgrading your placement strategy, you have options.
For local solutions and lifestyle tips, be sure to explore Colorado Springs Home Living. They offer great advice tailored to the modern connected household.
Let’s dive in.
Understand What Causes WiFi Dead Spots
WiFi dead spots aren’t random. They’re usually caused by:
- Physical obstructions like walls, floors, or even mirrors.
- Distance from the router or modem.
- Interference from other devices (like microwaves or baby monitors).
- Outdated router technology or low bandwidth plans.
According to the Federal Communications Commission (FCC), most homes in the U.S. don’t use their internet to its full potential due to outdated hardware or poor placement.
Example:
My friend’s basement home gym had zero connectivity. The culprit? A concrete floor, plus the router was on the opposite end of the house. By simply relocating his router upstairs and closer to the center, his gym instantly came online.
Key takeaway:
Before buying new gear, map out your dead spots. Use a WiFi analyzer app to check where the signal drops. This step helps you decide what kind of solution is best. It’s also wise to discover home internet service at https://coloradospringshomeliving.com/reviews/best-home-internet-in-colorado-springs/ to see if better options are available in your area.
Optimize Your Router’s Placement
Where you place your router can make or break your WiFi experience.
Best practices for placement:
- Put it in a central location, away from walls and metal objects.
- Elevate it—higher placement equals better coverage.
- Keep it out in the open. Hiding it in cabinets weakens signals.
- Avoid interference-prone areas like next to TVs or microwaves.
According to Consumer Reports, WiFi signals can drop by up to 30% when a router is placed behind walls or near heavy appliances.
When I moved my router from the corner of the kitchen to a shelf in the hallway, I saw a 50% signal boost in the furthest rooms. Sometimes, the simplest fix makes the biggest difference.
Try this tip:
If you live in a multi-story house, place your router on the middle floor. This ensures vertical signal coverage.
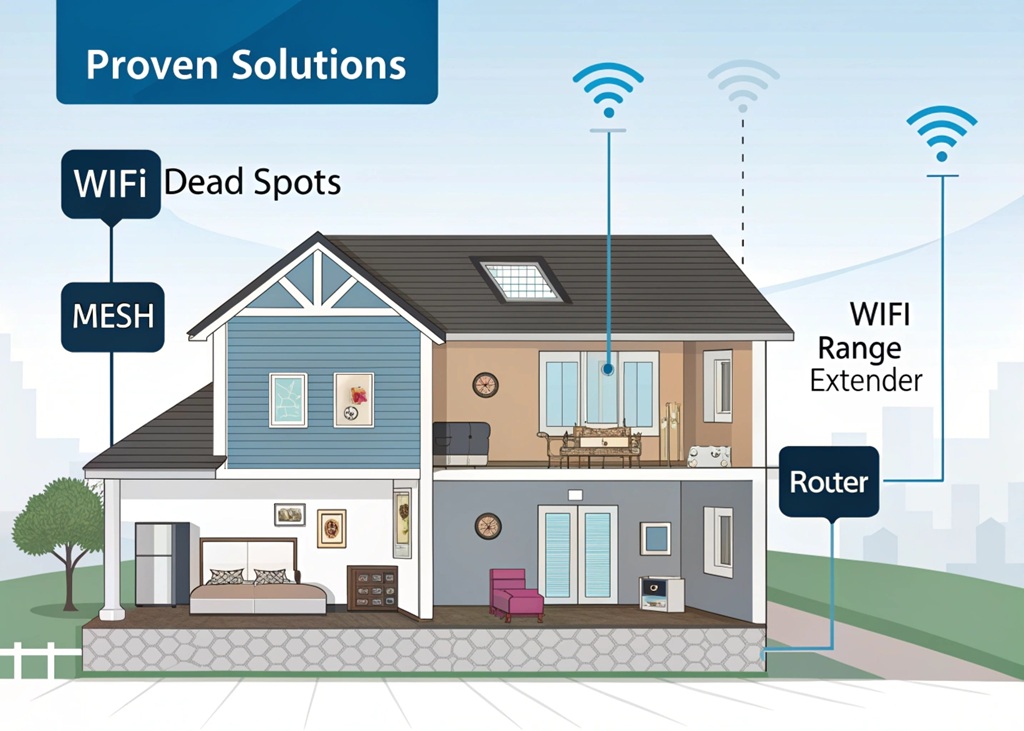
Upgrade to a Mesh WiFi System
If relocating the router doesn’t help, consider a mesh WiFi system. It’s a game changer for larger homes or those with many walls.
What is a mesh WiFi system?
It uses multiple nodes (mini routers) placed throughout your home. These nodes communicate to provide consistent coverage everywhere.
Benefits:
- Seamless signal as you move around the house.
- Easy to set up and manage via app.
- Expands coverage to hard-to-reach areas like garages or basements.
According to PCMag, homes over 2,000 square feet benefit most from mesh systems. In fact, 75% of users reported fewer dead zones after switching to mesh.
When I installed a mesh system, even my backyard patio got full bars. It was like giving my house a WiFi facelift.
Price range:
$150–$400 for most systems, depending on size and brand.
Consider a WiFi Range Extender or Booster
If you don’t want to splurge on a mesh system, try a WiFi range extender or booster. These are affordable tools that amplify your existing signal.
Key differences:
- Extender: Connects to your router and rebroadcasts the signal.
- Booster: Enhances the signal strength.
Tips for setup:
- Place halfway between the router and the dead zone.
- Avoid thick walls or floors between the router and the extender.
- Name the network the same as your main WiFi for seamless transition.
Many users find extenders perfect for covering just one tricky room. I placed one in my detached garage to keep my smart tools online, and it worked flawlessly.
Note:
Extenders can reduce bandwidth slightly. For basic browsing or streaming, they work well. For gaming or 4K streaming, consider a mesh setup.
Upgrade Your Router and Internet Plan
Sometimes, the problem isn’t your home—it’s your equipment or internet speed.
Signs you need a new router:
- It’s over 4–5 years old.
- It only supports 2.4 GHz and not dual-band (2.4 GHz + 5 GHz).
- You’ve added many smart home devices recently.
According to Statista, households with 10+ connected devices (which is most homes now) need routers with dual or tri-band capability.
And if you’re constantly buffering, your plan might be too slow. Check your provider’s speed promises and compare them with reality using a speed test.
Hardwire When Possible
For stationary devices like desktops, gaming consoles, or smart TVs, consider using an Ethernet cable.
Benefits of wired connections:
- Stable and faster speeds.
- No interference from walls or devices.
- Lower latency for gaming or video calls.
This isn’t always convenient, but for home offices or media setups, it’s worth it. I personally hardwired my office desktop and noticed a 30% increase in download speeds.
You can also use powerline adapters, which send internet through your home’s electrical wiring. Plug one near your router, and another in the dead zone—voilà, wired internet without running long cables.
Regularly Reboot and Update Your Devices
Don’t overlook the basics. Sometimes the issue lies in outdated firmware or overheating hardware.
Tips:
- Restart your router every week or two.
- Update router firmware through its app or web interface.
- Replace faulty cables or adapters.
- Scan for connected devices that might be hogging bandwidth.
I once found my neighbor’s tablet connected to my guest WiFi—streaming HD videos! After a password change and router reboot, things ran smoothly again.
Read More Also: Filmora Pan and Zoom Effect With Smooth Transitions: A Complete Guide
Conclusion
Dead spots don’t have to be a permanent part of your home. From simple placement tricks to smart tech upgrades, you can transform your signal strength and improve your daily life.
Let’s face it—WiFi is no longer a luxury; it’s a necessity. Whether you’re working from home, streaming your favorite show, or managing smart devices, a strong and consistent signal is essential.
Now it’s your turn! Have you fixed your own dead spot problem? Got a tip or question? Leave a comment below and help others stay connected too. And if this guide helped you, share it with a friend.
Read More Also: How to Calibrate a Bubble Level at Home Without Special Tools
FAQs
### What causes WiFi dead spots in a house?
WiFi dead spots happen due to walls, metal objects, poor router placement, or interference from other devices.
### What is the best solution for WiFi dead zones?
A mesh WiFi system is the most effective long-term fix, especially for large or multi-floor homes.
### Do WiFi boosters really work?
Yes, they can work well for extending coverage to a single room or small area with weak signal.
### How do I find the dead spots in my home?
Use free apps like NetSpot or WiFi Analyzer to walk around and map where signals drop.
### Can too many devices cause a weak WiFi signal?
Yes, especially with older routers. Newer routers handle more connections better with dual or tri-band technology.