
How to Sharpen Lawn Mower Blades at Home: Easy Steps for a Cleaner Cut

If you’ve noticed ragged, brown-edged grass after mowing, your mower blades may be dull. Dull blades tear rather than cut cleanly. This stresses the grass and makes your lawn more vulnerable to disease and pests.
Sharpening your mower blades at home can save money and improve your lawn’s health. Most experts agree that blades should be sharpened after every 20–25 hours of mowing. That’s about every 2-3 weeks during peak grass-growing seasons.
From personal experience, I used to think sharp blades didn’t make much difference. But after properly sharpening mine one summer, I saw faster mowing, healthier grass, and fewer clogs in the mower deck.
The best part? You don’t need fancy tools or a workshop to get the job done. All you need is some basic gear and about 30 minutes.
If you’re unsure where to start with blade care, explore Boyers Lawn Care for expert tips and lawn equipment guidance.
Step 1: Safety First – Prepare Your Mower
Before sharpening anything, always prioritize safety. Mower blades are sharp enough to cut even when dull. Taking proper precautions will prevent injury.
Here’s what to do:
- Disconnect the spark plug wire. This prevents accidental engine start.
- Wear cut-resistant gloves.
- Turn the mower on its side with the air filter facing up.
- Place a wooden block to secure the blade for removal.
According to the Consumer Product Safety Commission, over 85,000 lawn mower injuries are treated in U.S. emergency rooms each year. A significant number come from accidents during maintenance. Always slow down and double-check safety steps.
Additionally, make sure your tools are in good condition. A worn-out wrench or cracked file could slip and cause harm. Use goggles to protect your eyes from metal shavings and dirt.
Preparing properly sets the tone for a smooth sharpening experience. You’ll feel more confident and focused throughout the process. If you’re unsure what your blade should look like, check the owner’s manual or look online for your specific mower model. You can also discover grass trimming at https://boyerslawncare.com/lawn-care-equipment/what-are-the-safety-precautions-for-cutting-grass/ to learn about proper blade handling and safety techniques.
Step 2: Remove the Blade with the Right Tools
To sharpen your blade effectively, you’ll need to take it off. Here’s how:
Tools you’ll need:
- Socket wrench
- Wooden wedge or block
- Pen or chalk (to mark blade orientation)
- Penetrating oil (if the bolt is rusted)
Steps:
- Mark which side of the blade faces downward.
- Use the wooden block to keep the blade from turning.
- Loosen the bolt with a socket wrench. Apply penetrating oil if it’s stuck.
- Remove the blade and inspect for cracks or damage.
Blades with deep cracks or dents shouldn’t be sharpened. Instead, replace them to avoid breakage while mowing.
Taking the blade off is straightforward with the right tools and patience. If it’s your first time, don’t rush it. The rest of the process becomes much easier once the blade is off.
Step 3: Clean the Blade Before Sharpening
Dirt, rust, and old grass clippings build up on mower blades. These layers make sharpening harder and reduce blade lifespan. So before grabbing your file or grinder, start by cleaning.
How to clean a lawn mower blade:
- Use a wire brush to remove built-up debris.
- For stubborn grime, soak the blade in warm soapy water for 10–15 minutes.
- Dry the blade thoroughly to prevent rust.
Removing debris lets you clearly see nicks or worn-down edges. It also protects your sharpening tools from extra wear.
You can even use a handheld wire brush drill attachment to speed up the process. These tools are inexpensive and widely available at hardware stores like Lowe’s or Home Depot.
Cleaning also gives you a chance to check the blade’s balance. An unbalanced blade can vibrate during mowing and damage the engine over time. More on balancing in Step 5.
Remember: a clean blade is not just easier to sharpen—it’s safer and lasts longer.
Step 4: Sharpen the Blade – File or Grinder?
Now comes the sharpening. You can use a metal file, a bench grinder, or an angle grinder. Your choice depends on what tools you have and your comfort level.
Option 1: Using a Metal File
- Clamp the blade to a workbench.
- File at the existing angle (usually 30°–45°).
- Use smooth, even strokes in one direction only.
- Count your strokes to keep both sides even (usually 50–60 strokes).
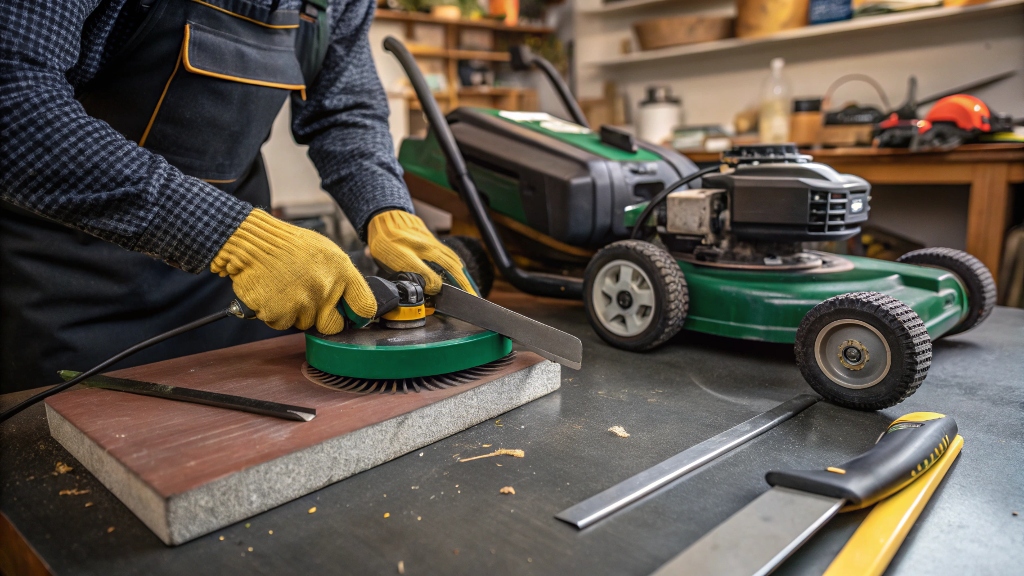
Option 2: Using an Angle Grinder
- Secure the blade with a clamp.
- Wear goggles and gloves.
- Move the grinder steadily along the cutting edge.
- Avoid overheating the metal. It can lose its temper (hardness).
Tip: Don’t aim for a razor-sharp edge. A slight bevel prevents fast dulling and keeps your blade strong.
According to University of Nebraska Extension, overly sharp blades tend to chip or nick faster. A smooth, beveled edge is ideal for durability and grass health.
Whether you choose a file or grinder, consistency is key. Uneven sharpening leads to unbalanced blades, which can cause mower vibration and engine wear.
Step 5: Balance the Blade Before Reinstalling
After sharpening both edges, it’s critical to balance your blade. An unbalanced blade can cause uneven mowing and put stress on your mower’s spindle.
Here’s how to check balance:
- Hang the blade horizontally on a nail or a blade balancer.
- If one side drops, it’s heavier. File it down slightly.
- Repeat the test until the blade stays level.
Balanced blades reduce vibration, noise, and wear on the mower.
Blade balancers are cheap—often under $10—and worth the investment. However, the nail test works fine if you’re sharpening occasionally.
Never skip balancing. I once installed a sharp but unbalanced blade and noticed odd shaking during mowing. It eventually led to a costly repair.
Taking this extra step saves your mower’s engine and ensures even cuts across your yard.
Step 6: Reinstall and Maintain Your Blades
Once sharpened and balanced, it’s time to reinstall your blade. Make sure to tighten the bolt firmly using the correct torque (usually listed in your mower’s manual).
Tips for Reinstallation:
- Align the blade the same way it was before removal.
- Use a torque wrench for precision.
- Reconnect the spark plug wire after installation.
To maintain sharpness longer:
- Avoid mowing over sticks or rocks.
- Clean the deck after each use.
- Sharpen blades every 20–25 hours of use.
Well-maintained blades last longer and reduce your mower’s fuel use. According to Consumer Reports, sharp blades improve fuel efficiency by up to 15%.
Consider keeping a second blade on hand. This allows you to swap out blades quickly and sharpen them at your convenience.
Discover More: Can You Really Make Mayonnaise in an Air Fryer?
Conclusion
Sharpening lawn mower blades at home isn’t just for pros—it’s simple, safe, and saves you time and money.
Let’s recap the steps:
- Disconnect and prep your mower
- Remove the blade safely
- Clean the blade thoroughly
- Sharpen it using your chosen method
- Balance it
- Reinstall with care
With regular sharpening, your mower will glide through the grass. You’ll see cleaner cuts, healthier turf, and a more professional-looking lawn.
If this guide helped, leave a comment below or share it with a fellow mower enthusiast!
Read More Also: Stop Roof Ponding Fast: Fixing a Flat Roof Ponding Issue the Right Way
FAQs
How often should I sharpen my lawn mower blades?
Every 20–25 hours of mowing or once every 2–3 weeks during the growing season.
Can I sharpen mower blades without removing them?
Yes, but it’s not recommended. Removing the blade ensures thorough sharpening and balancing.
What angle should I sharpen my blade?
Typically between 30°–45°. Follow the existing angle for best results.
Is it okay to use a bench grinder for sharpening?
Yes, if used carefully. Avoid overheating the blade and maintain the original angle.
How do I know if my blade is dull?
Look for torn grass tips or uneven mowing. Dull blades also cause increased engine strain.