Nail Gun PSI Settings: How Much Pressure Do You Really Need?

Nail guns are indispensable tools for professionals and DIY enthusiasts alike, streamlining construction, woodworking, and home improvement projects. However, one critical factor determines their effectiveness and safety: the PSI (pounds per square inch) setting. Getting the air pressure right ensures nails are driven correctly, prevents damage to materials, and keeps you safe. In this comprehensive guide, we’ll explore nail gun PSI settings, how much pressure you really need, and tips for optimizing performance across various tasks. Whether you’re framing a house, installing trim, or tackling a craft project, this article will help you master your nail gun’s PSI.
What Is PSI and Why Does It Matter for Nail Guns?
PSI measures the air pressure delivered by a compressor to power pneumatic nail guns, the most common type of nailer. The pressure directly impacts how forcefully the nail is driven into a material. Too little PSI, and the nail won’t sink fully, leaving it protruding or weak. Too much, and you risk splitting wood, damaging delicate surfaces, or even causing injury. Manufacturers provide recommended PSI ranges for each nail gun model, typically found in the user manual or on the tool itself, to balance power, precision, and safety.
Understanding PSI settings also ties into your air compressor’s capacity. Compressors are rated for both PSI and CFM (cubic feet per minute), which measures airflow volume. A nail gun needs consistent pressure and adequate airflow to function properly. For example, a framing nailer might require 90–120 PSI, while a finish nailer might need 70–100 PSI. Matching the PSI to the task and tool is key to achieving professional results.
Types of Nail Guns and Their PSI Requirements
Different nail guns serve distinct purposes, and each has unique PSI needs. Below, we break down the most common types and their typical pressure ranges:
1. Framing Nailers
- Purpose: Used for heavy-duty tasks like building house frames, decks, and fences.
- Nail Size: 2 to 3.5 inches, often 10- to 12-gauge.
- PSI Range: 90–120 PSI.
- Why: These nailers drive large, thick nails into dense materials like 2x4s or engineered lumber, requiring higher pressure for deep penetration and strong holds.
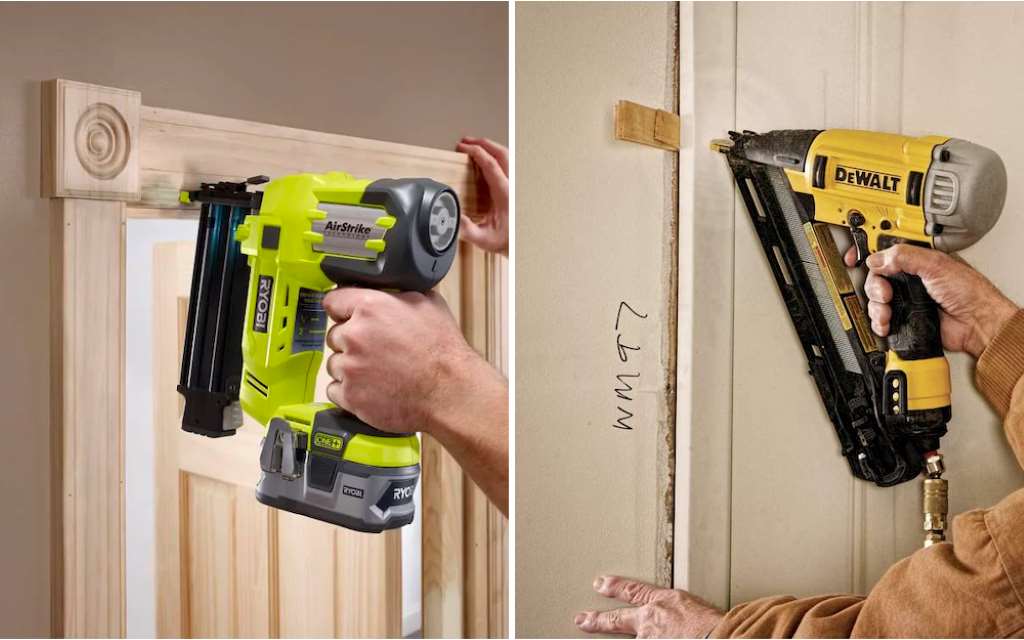
2. Finish Nailers
- Purpose: Ideal for precision work like installing trim, molding, and baseboards.
- Nail Size: 15- to 16-gauge, 1 to 2.5 inches.
- PSI Range: 70–100 PSI.
- Why: Lower pressure suits thinner, shorter nails to avoid damaging delicate wood or leaving visible marks.
3. Brad Nailers
- Purpose: Perfect for lightweight tasks like attaching thin trim, paneling, or crafts.
- Nail Size: 18-gauge, 5/8 to 2 inches.
- PSI Range: 60–100 PSI.
- Why: These smaller nails need less force, and excessive pressure can split fragile materials or overdrive the nail.
4. Roofing Nailers
- Purpose: Designed for securing shingles, roofing felt, and insulation boards.
- Nail Size: 3/4 to 1.75 inches, often 11- to 12-gauge.
- PSI Range: 90–110 PSI.
- Why: Consistent pressure ensures nails sit flush with roofing materials without penetrating too deeply.
5. Pin Nailers
- Purpose: Used for delicate woodworking, furniture assembly, or temporary holds.
- Nail Size: 23-gauge, 1/2 to 1 inch.
- PSI Range: 60–90 PSI.
- Why: Minimal pressure prevents damage to thin or soft materials like veneer.
Always check your nail gun’s manual for the exact PSI range, as models vary by brand and design.
Factors That Influence PSI Settings
The ideal PSI isn’t just about the nail gun type. Several variables affect the pressure you’ll need:
Material Density
Hardwoods like oak, maple, or pressure-treated lumber require higher PSI (e.g., 100–120 PSI for framing) to drive nails fully. Softer woods like pine or plywood may need less (e.g., 70–90 PSI) to avoid over-penetration.
Nail Length and Gauge
Longer, thicker nails (e.g., 3-inch, 10-gauge) demand more pressure for proper driving, often 100 PSI or more. Shorter, thinner nails (e.g., 1-inch, 18-gauge) work well at 60–80 PSI.
Project Conditions
- Temperature: Cold weather can reduce compressor efficiency, requiring a slight PSI boost.
- Altitude: Higher elevations have lower air density, potentially needing a PSI adjustment.
- Depth Control: Many nail guns have depth adjustment dials. Start at a lower PSI and tweak the depth setting to fine-tune penetration.
Compressor Capacity
Your air compressor must deliver steady PSI and sufficient CFM. For example, a framing nailer might need 2.5–4 CFM at 90 PSI. If the compressor can’t keep up, you’ll get inconsistent drives or delays. Discover How to Use Carabiner Multi-Tools.
How to Set the Right PSI for Your Nail Gun
Setting the correct PSI is a straightforward process. Follow these steps for optimal results:
- Read the Manual: Check the manufacturer’s recommended PSI range for your specific nail gun model.
- Inspect the Compressor: Ensure it’s rated to deliver the required PSI and CFM for your tool.
- Start Low: Set the compressor to the lower end of the PSI range (e.g., 70 PSI for a finish nailer).
- Test Fire: Drive a nail into a scrap piece of the same material you’re working with. Check if it’s flush, protruding, or overdriven.
- Adjust PSI: Increase by 5–10 PSI increments if the nail isn’t fully driven. Reduce if it’s too deep or damages the surface.
- Fine-Tune Depth: Use the nail gun’s depth adjustment feature to perfect the drive without over-relying on PSI changes.
- Monitor Consistency: Ensure the compressor maintains steady pressure during continuous use.
Safety Tip: Always wear safety glasses and gloves, and never point the nail gun at anyone, even when adjusting PSI.
Common PSI Mistakes to Avoid
Incorrect PSI settings can ruin projects or create hazards. Here are pitfalls to watch for:
- Over-Pressurizing: Excess PSI (e.g., 130 PSI on a brad nailer) splits wood, mars surfaces, or causes misfires. Stick to the recommended range.
- Under-Pressurizing: Too little PSI leaves nails proud, weakening joints and requiring manual hammering.
- Ignoring Compressor Limits: If your compressor maxes out at 100 PSI, don’t use a nailer needing 120 PSI—it won’t perform reliably.
- Skipping Tests: Always test on scrap material to avoid costly mistakes on your actual project.
PSI Settings for Specific Projects
Here’s a quick reference for common tasks:
| Project | Nail Gun Type | Typical PSI Range | Notes |
| Framing a Wall | Framing Nailer | 90–120 PSI | Use higher PSI for hardwoods. |
| Installing Baseboards | Finish Nailer | 70–100 PSI | Lower PSI for soft pine to avoid marks. |
| Attaching Thin Trim | Brad Nailer | 60–90 PSI | Test to prevent splitting delicate wood. |
| Roofing Shingles | Roofing Nailer | 90–110 PSI | Ensure flush driving for weatherproofing. |
| Furniture Assembly | Pin Nailer | 60–90 PSI | Minimal pressure for precision. |
Maintenance Tips for Consistent PSI Performance
To keep your nail gun and compressor delivering the right pressure:
- Clean the Nail Gun: Remove dust, debris, and oil buildup to prevent jams that affect pressure.
- Check Hoses and Fittings: Leaks in air hoses or connectors reduce PSI. Inspect and replace as needed.
- Drain the Compressor: Remove moisture from the tank daily to maintain consistent airflow and pressure.
- Lubricate the Tool: Use pneumatic tool oil (per the manual) to keep internal parts moving smoothly.
- Store Properly: Keep the nail gun and compressor in a dry, cool place to avoid rust or damage.
Safety Considerations for Nail Gun PSI
Safety is paramount when working with nail guns. Beyond setting the right PSI:
- Wear PPE: Safety glasses, gloves, and ear protection guard against flying debris and noise.
- Disconnect Air: Turn off the compressor and release pressure when adjusting or storing the tool.
- Check Trigger: Ensure the safety trigger works to prevent accidental firing.
- Follow Ratings: Never exceed the nail gun’s maximum PSI rating to avoid malfunctions or injury.
Choosing the Right Compressor for Your Nail Gun
Your air compressor must match your nail gun’s needs. For small projects (brad or finish nailers), a 1–2 gallon compressor with 90–120 PSI and 2–4 CFM works well. For heavy-duty framing or roofing, opt for a 4–6 gallon model delivering 120 PSI and 4–6 CFM. Brands like DeWalt, Makita, and Bostitch offer reliable options. Check reviews for durability and consistent pressure output.
Conclusion
Nail gun PSI settings are the key to precision, efficiency, and safety in any project. By understanding your nail gun type, material, and nail size, you can dial in the perfect pressure—typically 60–120 PSI depending on the task. Start low, test on scrap, and adjust gradually for flawless drives. Pair this with a capable compressor, regular maintenance, and strict safety practices, and you’ll tackle framing, finishing, or roofing like a pro. Next time you pick up your nail gun, you’ll know exactly how much pressure you really need.