How to use a bicycle chain tool?
A bicycle chain tool can be very useful when you need to fix your bicycle chain. It’s one of those tools that you’ll never know you need until you do. You may not have thought of using a bicycle chain tool before, but it will certainly come in handy when you’re out on the road. A bicycle chain tool is designed to help you loosen and tighten your bicycle chain. Try the bmx bikes for tall riders. You may have to use it once or twice to get the hang of it, but it’s worth the effort.
How to use the bicycle chain tool?
A bicycle chain is a very important part of a bike. It is used to connect the rear wheel to the pedal. If a bike chain becomes loose or broken, it can cause damage to the bike itself.
There are a number of tools available that allow users to quickly and easily fix a loose or broken chain. Here we’ll present you with a short guide on how you can fix a broken chain with a bicycle chain tool.
Before you start, make sure you read the owner’s manual of your bicycle chain tool. Otherwise, you could end up breaking your bike chain if you do not know what you’re doing.
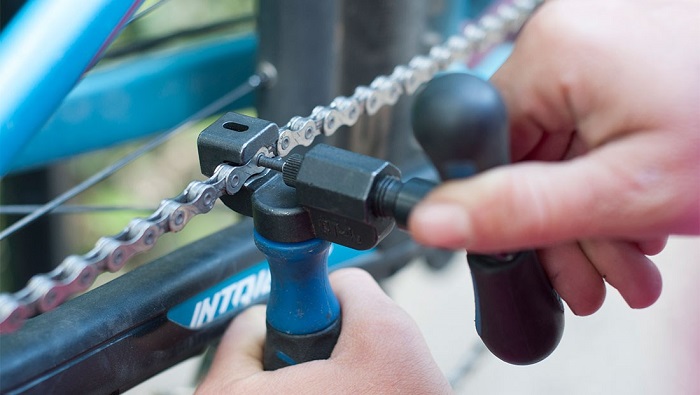
Step 1: Open the tool
Before you start using your chain tool, make sure you open the tool. You can do this by pressing the button on the chain tool until the tool starts vibrating and spinning around. You may also like to read https://greatestjournal.com/how-do-i-know-if-my-bike-chain-needs-oil/
Step 2: Select the right tool
After opening the tool, you can select the type of chain that you’re working on. For a standard chain, select the right size chain tool. If the chain tool is too small for the chain, you may need to select the next size up.
Step 3: Fix the chain
After selecting the right chain tool, you can start to fix the chain. Using the chain tool, loosen the chain at the sprocket closest to the front wheel. You should only loosen the chain at the front wheel. When you remove the chain, it may be broken. In this case, try to fix the broken link.
Step 4: Put the chain back
After fixing the broken link, put the chain back. Make sure the chain is tight before you put it back into the sprocket. Once you’ve fixed the chain, you can tighten the chain tool.
Repair chain with the bicycle chain tool
A bicycle chain is a very important part of a bicycle. This is a mechanical device that is connected to the bicycle’s wheel to provide motion to the wheel. Most of the time, we would like to keep our bicycles in good working condition. However, the thing that happens when we ride our bikes in bad weather is that the chain may become loose or damaged.
In this case, we need to repair the chain in order to avoid accidents and to use the bike efficiently. Therefore, here are some helpful tips about repairing chains.
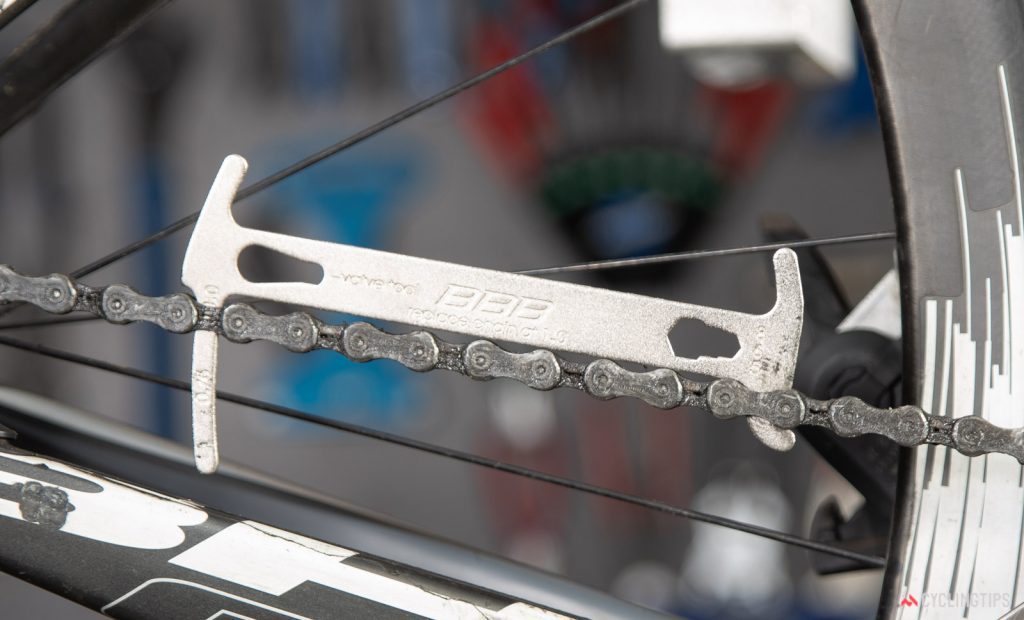
Check the length of the chain. The chain should be long enough to connect the chain wheel and the sprocket on the bicycle.
If the chain is too long, it is likely to be damaged. If you are sure that you have enough length, then try to put the chain wheel into the rear axle. If the chain is damaged, you can replace it with a new one.
You need to lubricate the chain regularly. When you lubricate the chain, you can prevent the chain from wearing out easily.
The chain must be in the right position. Make sure that the chain is properly positioned in the middle of the chain wheel. You can do it by moving the chain wheel to the back of the rear wheel. Then, the chain should be placed in the middle.
You need to rotate the chain regularly. You need to make sure that the chain is rotated every time you ride your bicycle.
If you want to repair the chain, you can use a chain tool. It is a tool that is designed specifically to repair the chain. You can get it at any bicycle shop.
Tips and tricks to using the bicycle chain tool
- Chain tools are useful for cleaning up a chain. They can help you to get rid of the dirt and grime that has built up over time. It’s also a good way of keeping your chain clean and lubricated.
- Start with a clean chain: The first step to using the chain tool is to make sure you have a clean chain. You’ll need to remove the chain from your bike and then clean it with a chain cleaner. You’ll want to make sure that you clean it well and that you get all the grime off. You can use a chain tool to help you do this.
- Get started: Once you’ve cleaned your chain, it’s time to get started. You’ll want to use the chain tool to get all the grime off. You can use a chain tool to help you do this.
- Keep going: Once you’ve finished cleaning your chain, it’s time to keep going. You’ll want to make sure you use the chain tool to get all the grime off. You can use a chain tool to help you do this.
- Finish up: Once you’ve finished cleaning your chain, it’s time to finish up. You can use a chain tool to help you get rid of any excess oil or grease. You can also use a chain tool to clean your chain.
- Make sure it’s clean: Once you’ve finished using the chain tool, it’s time to make sure that the chain is clean. You can use a chain tool to help you do this.
- Store it: After you’ve used the chain tool, it’s time to store it. You can store it in the box that came with the chain tool. You can also use a chain tool to help you store the chain.
- Use it: After you’ve stored your chain tool, it’s time to use it. You can use a chain tool to help you clean your chain.
In conclusion
A bicycle chain tool is a small tool used to clean and lubricate bicycle chains. This tool is used to remove rust from the chain and to prevent the chain from breaking. A chain tool is also used to clean the chain, clean the gears, and lubricate the chain. It is used to remove dirt and grime from the chain. It is also used to keep the chain free of dust and grime.