Surfboard Tail Block Damage Repair: A Complete Guide to Restoring Your Board
Surfboards take a beating. Whether you’re a weekend warrior or a daily wave rider, your board will eventually show signs of wear. The tail block area is especially vulnerable to damage. This critical section of your surfboard affects performance and stability. When damage strikes, knowing how to address it quickly can save your board and your sessions. At The Surfing Village, we understand how important it is to keep your equipment in top shape.
Tail block damage doesn’t mean the end of your surfboard’s life. Many riders face this issue and successfully repair their boards. The tail block sits at the rear of your surfboard where the fins attach. This area endures significant stress from paddle impact, rocky shorelines, and transportation mishaps. Small cracks can quickly become major problems if left unattended. Understanding the repair process helps you make informed decisions about your board’s care.
Professional surfboard repair techniques have become more accessible to everyday surfers. However, tail block damage requires specific attention due to the structural importance of this area. The repair process involves several key steps that ensure your board maintains its original performance characteristics.
Understanding Tail Block Damage
The tail block serves multiple functions on your surfboard. It provides structural support for the fin system and helps maintain the board’s overall integrity. Damage to this area can manifest in various forms. Cracks, delamination, and impact holes are the most common issues surfers encounter.
Identifying damage early makes repairs easier and more effective. Visual inspection should become part of your regular surfboard maintenance routine. Look for discoloration, soft spots, or visible cracks around the tail section. Water intrusion is a serious concern because it can rot the foam core from the inside out.
Different types of surfboards have varying tail block constructions. Epoxy boards differ from traditional polyester boards in their repair requirements. The materials used in your board’s construction determine which repair methods work best. Understanding your board’s composition is the first step toward successful restoration.
Essential Tools and Materials for Tail Block Repair
Gathering the right supplies before starting your repair saves time and frustration. You’ll need resin appropriate for your board type, fiberglass cloth, sandpaper in various grits, and mixing containers. Additionally, acetone for cleaning, disposable brushes, and protective gloves are essential.
Quality materials make a significant difference in repair longevity. According to Surfer Magazine, using marine-grade materials ensures your repair withstands saltwater exposure and temperature changes. Cheap alternatives might seem economical initially but often fail prematurely.
Safety equipment deserves equal attention. Respirators protect your lungs from harmful fumes during the resin application process. Working in a well-ventilated area is non-negotiable. Furthermore, eye protection and old clothing prevent accidental contact with chemicals.
Step-by-Step Tail Block Repair Process
Preparation is crucial for successful surfboard restoration. Begin by thoroughly cleaning the damaged area with fresh water. Remove all wax, dirt, and salt residue. The surface must be completely dry before proceeding. Moisture trapped under your repair will cause future problems.
Next, assess the extent of the damage. Minor surface cracks require different treatment than deep impacts. Use a sharp utility knife to remove any loose or damaged material. Create clean edges around the damaged area to ensure proper adhesion. This step might seem counterintuitive because you’re making the hole bigger, but it creates a solid foundation.
Sand the surrounding area with medium-grit sandpaper to create a rough surface. This roughness helps the new material bond with the existing board. Extend your sanding about two inches beyond the damaged zone. Wipe away all dust with a clean, dry cloth.
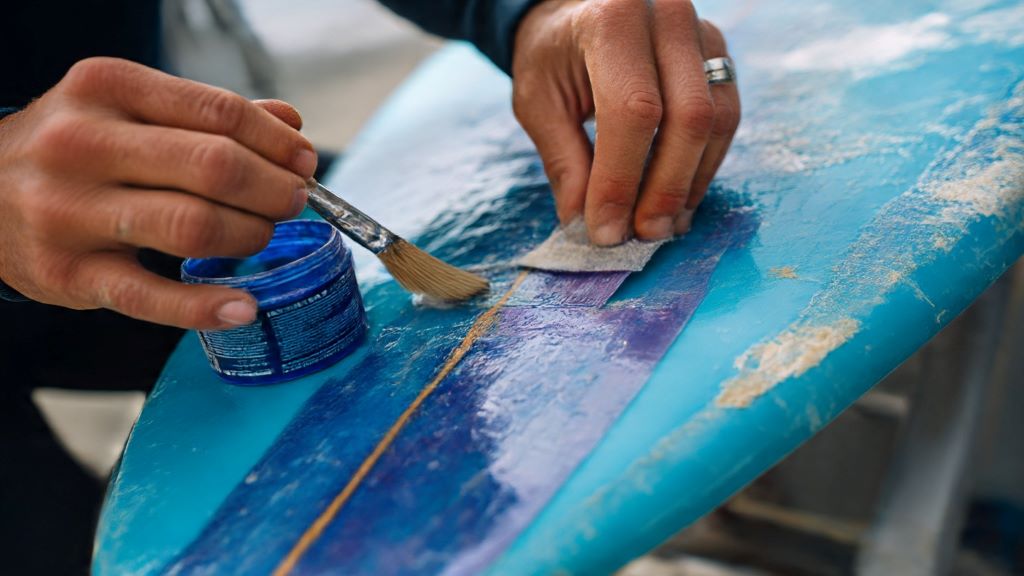
Apply masking tape around the repair area to protect undamaged sections. This tape also helps create clean lines for a professional-looking finish. Cut your fiberglass cloth to size, allowing extra material to overlap the sanded area.
Mix your resin according to manufacturer instructions. Temperature affects curing time, so adjust your catalyst ratio accordingly. Apply the first layer of resin to the damaged area, then place your fiberglass cloth over it. Use a brush or squeegee to work out air bubbles and ensure complete saturation.
Advanced Repair Techniques for Severe Damage
Extensive tail block damage sometimes requires foam replacement. This process involves cutting away damaged foam and fitting new foam pieces. Shaping foam demands patience and precision. The replacement piece must match the board’s original contours perfectly.
Structural reinforcement becomes necessary when damage compromises the fin box area. Carbon fiber strips or additional fiberglass layers can restore strength. These reinforcements should extend well beyond the damaged zone to distribute stress effectively.
Professional shapers often use vacuum bagging for high-quality repairs. This technique removes excess resin and air bubbles while creating a stronger bond. Although it requires specialized equipment, the results justify the investment for valuable boards.
Finishing and Sanding Your Repair
Allow adequate curing time before sanding your repair. Rushing this step leads to gummy messes and poor results. Curing times vary based on temperature and resin type. Generally, 24 to 48 hours provides sufficient hardening time.
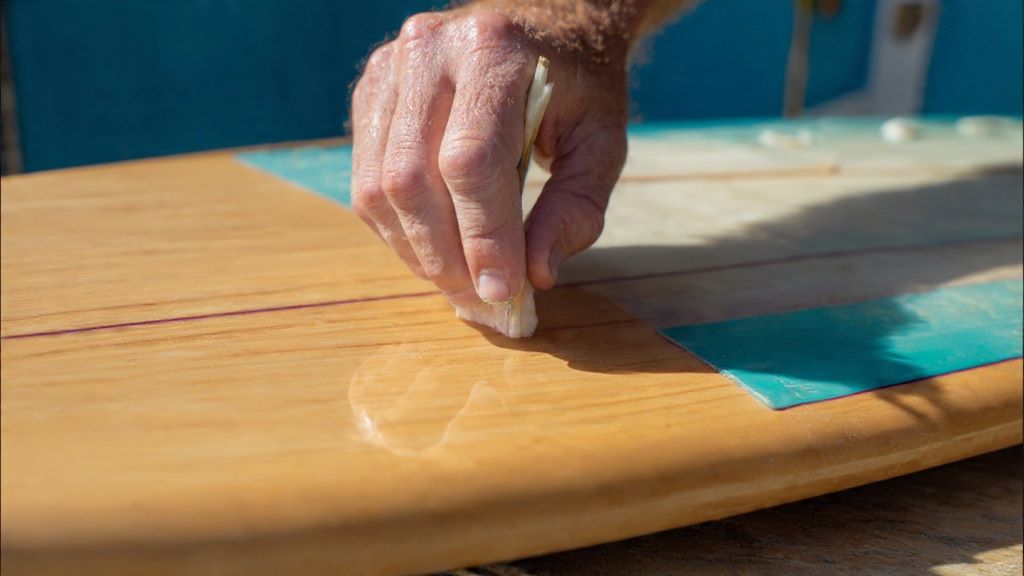
Start sanding with coarse-grit paper to level the repair with the surrounding surface. Progress through increasingly finer grits until you achieve a smooth finish. Wet sanding with very fine grit paper creates the smoothest results. This technique also reduces airborne dust.
The final sanding should blend the repair seamlessly with the original surface. Run your hand over the area repeatedly to check for inconsistencies. Your sense of touch often detects imperfections your eyes miss.
Preventing Future Tail Block Damage
Protection strategies extend your surfboard’s lifespan significantly. Invest in a quality board bag with adequate padding. Tail protection sleeves offer extra cushioning for this vulnerable area. These simple accessories prevent countless repair projects.
Proper storage practices matter tremendously. Store your board in a cool, shaded area away from direct sunlight. UV exposure weakens fiberglass and causes yellowing. Avoid leaving boards in hot cars where temperature extremes cause expansion and contraction.
Regular maintenance catches small problems before they become major repairs. Rinse your board with fresh water after each session. Inspect the tail block area weekly during active surfing periods. Quick fixes prevent water intrusion and extensive damage.
Transport your board carefully. Use rack pads on your vehicle and secure boards properly. According to The Inertia, most surfboard damage occurs during transportation rather than actual surfing. A moment of carelessness can mean hours of repair work.
When to Seek Professional Help
Some repairs exceed amateur capabilities. Deep structural damage, extensive delamination, or fin box replacement often require professional expertise. Attempting complex repairs without proper experience can worsen the damage.
Professional repair shops have specialized tools and materials unavailable to most home repairers. Their experience also means faster turnaround times and better results. The cost difference between professional and DIY repairs narrows when you factor in materials and potential mistakes.
However, learning basic repair skills empowers surfers to handle minor damage immediately. Small dings repaired quickly prevent major problems. Building your repair knowledge gradually helps you recognize when professional intervention becomes necessary.
Conclusion
Tail block damage doesn’t signal the end of your surfboard’s useful life. With proper knowledge, tools, and techniques, most damage can be effectively repaired. Understanding your board’s construction, preparing thoroughly, and taking your time during repairs ensures successful restoration. Prevention through proper storage and transportation practices reduces repair frequency. Whether you tackle repairs yourself or seek professional help, addressing damage quickly preserves your board’s performance and extends its lifespan. Remember that every repair teaches valuable lessons about surfboard construction and maintenance. Keep your board in excellent condition, and it will reward you with countless memorable sessions.
Frequently Asked Questions
How long does tail block repair take to complete?
Most tail block repairs require 24 to 72 hours from start to finish. The actual working time is usually just a few hours, but curing time between steps accounts for most of the duration. Temperature and humidity affect curing speed, so plan accordingly and avoid rushing the process.
Can I surf immediately after repairing my tail block?
No, you should wait at least 48 hours after completing your repair before surfing. The resin needs adequate time to fully cure and harden. Premature water exposure can compromise the repair and allow water intrusion into the foam core.
How much does professional tail block repair cost?
Professional tail block repairs typically range from $75 to $200 depending on damage severity and board type. Complex repairs involving structural work or fin box replacement cost more. Getting quotes from multiple repair shops helps ensure fair pricing.
What’s the difference between epoxy and polyester resin for repairs?
Epoxy resin works with both epoxy and polyester surfboards and provides stronger, more flexible bonds. Polyester resin only works on polyester boards and doesn’t adhere properly to epoxy constructions. Always match your repair materials to your board’s original construction.
How can I tell if water has entered my surfboard through tail damage?
Water intrusion typically causes discoloration, increased weight, and a sloshing sound when the board is moved. The damaged area may feel soft or spongy. If you suspect water damage, drill a small drain hole at the lowest point and let the board dry completely before repairing.
Related Topics:
Best Surfboard Wax Remover Hacks to Keep Your Board Fresh
Ditch the Wax: Real Solutions to Grip Problems in Surfing Without the Sticky Mess