
Cleaning Dyson Stick Vacuum: Your Complete Maintenance Guide
Keeping your Dyson stick vacuum in top condition ensures optimal performance and extends its lifespan significantly. Regular maintenance prevents loss of suction, eliminates unpleasant odors, and keeps your cleaning routine efficient. Whether you own a V8, V11, V15, or any other model, proper care makes all the difference.
Many homeowners invest in quality cleaning equipment from brands featured on Best Vacuum Cleaner websites but neglect routine maintenance. This oversight often leads to decreased performance and premature wear. Understanding the proper techniques for maintaining your device will save you money and frustration in the long run.
Why Regular Cleaning Matters
Dyson stick vacuums are engineering marvels, but they require attention to maintain their powerful suction. When you follow proper cleaning dyson stick vacuum procedures, you prevent clogs, extend filter life, and ensure consistent performance. Neglecting maintenance can reduce suction by up to 50% within just a few months.
Additionally, accumulated debris creates breeding grounds for bacteria and mold. These contaminants can trigger allergies and spread throughout your home during vacuuming sessions. Regular cleaning eliminates these health hazards while keeping your vacuum operating at peak efficiency.
Understanding Your Dyson’s Components
Before diving into cleaning procedures, familiarize yourself with the main components. Every Dyson stick vacuum includes a dustbin, filter system, brush bar, and various attachments. Each part requires specific cleaning methods to avoid damage.
The cyclone assembly separates dirt from air using centrifugal force. This sophisticated system maintains suction power but needs occasional cleaning to remove fine dust particles. Meanwhile, the filter traps microscopic allergens and must be washed regularly according to manufacturer guidelines.
The motorized brush bar agitates carpet fibers and captures embedded dirt. Hair and debris wrap around the bristles over time, reducing effectiveness. Therefore, checking and cleaning this component weekly prevents performance issues.
Step-by-Step Cleaning Process
Emptying the Dustbin
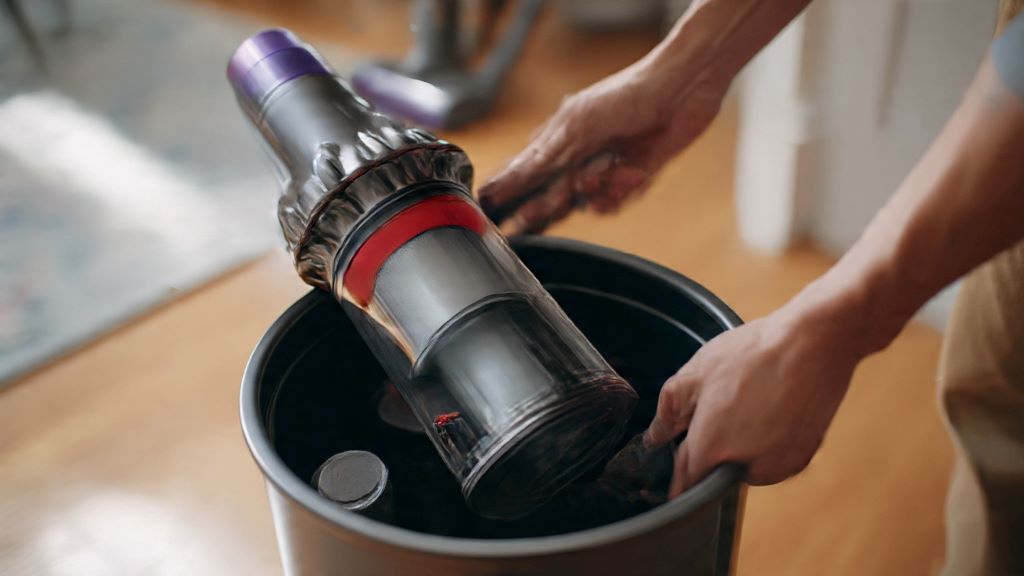
Empty your dustbin after every use or when debris reaches the maximum fill line. Press the red bin release button and hold the unit over a trash receptacle. Tap gently to dislodge stubborn particles clinging to the cyclone walls.
For thorough cleaning, remove the bin completely and rinse it under cold water. Avoid hot water, which can warp plastic components. Allow the bin to air dry completely for at least 24 hours before reattaching it to prevent moisture damage to the motor.
Washing the Filter
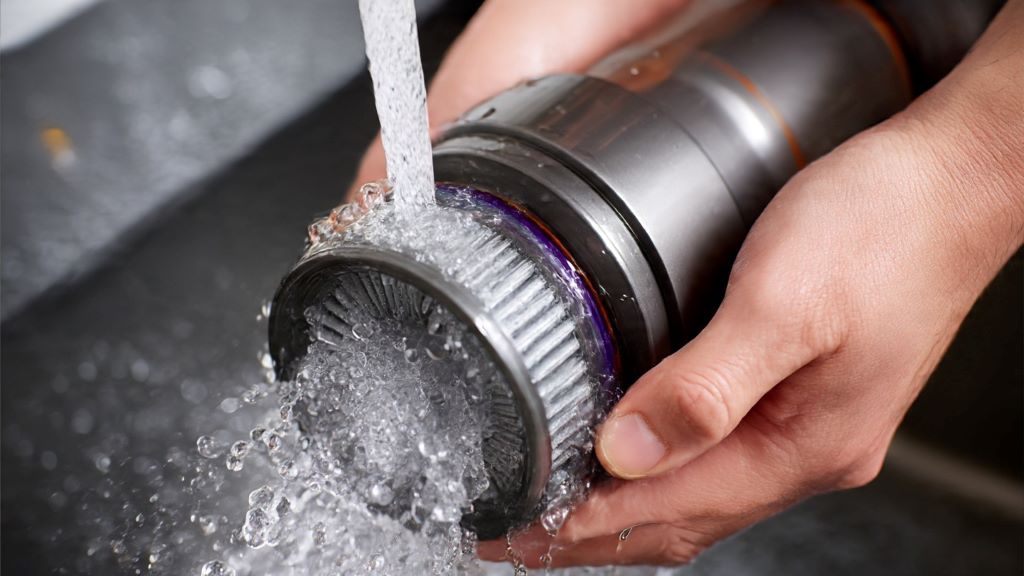
Dyson recommends washing filters at least once monthly, though households with pets may need more frequent cleaning. Remove the filter by twisting it counterclockwise from the main body. Some models have additional filters near the motor that also require attention.
Rinse the filter under cold running water without using detergents or cleaning products. Squeeze gently to remove excess water and continue rinsing until the water runs clear. According to Dyson’s official maintenance guidelines, filters must dry naturally for 24 hours minimum before reinstallation.
Never place filters in dishwashers, dryers, or microwaves. These methods damage the filter material and void your warranty. Simply set filters aside in a well-ventilated area away from direct sunlight or heat sources.
Cleaning the Brush Bar
Hair, string, and fibers constantly wrap around the brush bar during normal use. These tangles restrict rotation and strain the motor unnecessarily. Consequently, cleaning this component every two weeks prevents motor damage and maintains optimal cleaning performance.
Use scissors or a seam ripper to carefully cut away wrapped debris. Some Dyson models feature removable brush bars that simplify this process. Slide the red fastener to release the brush bar, remove tangled materials, and wipe down the housing with a damp cloth.
Inspect the brush bar bristles for wear patterns or damage. Worn bristles reduce agitation effectiveness on carpets. Replacement brush bars are available directly from Dyson or authorized retailers when bristles become noticeably shorter or uneven.
Maintaining Suction Power
Several factors contribute to reduced suction beyond dirty filters and full dustbins. Blockages in the wand or attachments restrict airflow significantly. Check these components regularly by detaching them and looking through for obstructions.
Hold each attachment up to a light source to spot blockages easily. Use a straightened coat hanger or similar tool to dislodge stubborn clogs. However, work carefully to avoid scratching or damaging internal surfaces.
Furthermore, inspect the main vacuum head for blockages. Flip the unit over and examine the opening where debris enters. Large items like socks or toys can lodge here and dramatically reduce performance. Remove any visible obstructions immediately.
Deep Cleaning Tips
Beyond routine maintenance, periodic deep cleaning keeps your Dyson functioning like new. Every three months, disassemble all removable components and clean each piece thoroughly. This includes attachment tools, extension wands, and the docking station.
Wipe down all plastic surfaces with a slightly damp microfiber cloth. Avoid harsh chemicals that can damage finishes or leave residue. For stubborn grime, mix mild dish soap with water and apply sparingly with a soft cloth.
Pay special attention to the seals around the dustbin and filter compartments. These rubber gaskets prevent air leaks that reduce suction. Clean them gently and check for cracks or deterioration that might require replacement parts.
Troubleshooting Common Issues
Sometimes cleaning alone doesn’t resolve performance problems. Pulsing or intermittent operation often indicates battery issues rather than maintenance problems. Try fully charging the battery and testing again before assuming mechanical failure.
Unusual noises during operation may signal foreign objects lodged in the brush bar or motor housing. Stop using the vacuum immediately and inspect thoroughly. Continuing to operate with obstructions can cause permanent motor damage.
Persistent odors despite regular cleaning might indicate mold growth in hidden areas. Disassemble all washable components and ensure they dry completely between uses. Consider replacing filters if odors remain after thorough cleaning and drying.
Extending Your Vacuum’s Lifespan
Proper storage protects your investment between cleaning sessions. Mount your Dyson on its wall dock in a cool, dry location away from direct sunlight. Extreme temperatures and humidity accelerate component degradation over time.
Battery care significantly impacts longevity according to Consumer Reports battery maintenance research. Avoid storing the vacuum in hot garages or cold basements. Keep the battery between 40-80% charge for optimal health when not in use regularly.
Replace worn parts promptly rather than waiting for complete failure. Damaged seals, worn brush bars, and degraded filters force other components to work harder. This increased strain shortens overall lifespan and can lead to costly repairs.
Seasonal Maintenance Considerations
Adjust your maintenance schedule based on usage patterns throughout the year. Spring and fall typically bring increased vacuuming frequency due to seasonal allergens and outdoor debris. During these periods, check filters weekly and empty dustbins more frequently.
Pet owners should intensify maintenance during shedding seasons. Extra hair accumulation requires more frequent brush bar cleaning and filter washing. Consider purchasing spare filters to maintain cleaning schedules without waiting for parts to dry.
Holiday seasons with increased foot traffic and decorations also demand extra attention. Pine needles, glitter, and other seasonal debris can clog filters faster than normal household dirt. Empty the dustbin after each use during busy periods to prevent overflow and maintain suction.
Conclusion
Maintaining your Dyson stick vacuum requires minimal time but delivers substantial benefits. Regular cleaning prevents performance decline, eliminates odors, and extends your vacuum’s useful life considerably. Following manufacturer guidelines while establishing consistent maintenance routines ensures reliable operation for years.
Remember to empty dustbins after each use, wash filters monthly, and clean brush bars biweekly. These simple habits prevent most common problems and keep your vacuum performing optimally. Investing a few minutes in routine maintenance protects your initial investment and maintains cleaning effectiveness throughout your home.
Frequently Asked Questions
How often should I replace my Dyson stick vacuum filter?
Dyson filters typically last 12 months with proper monthly washing and drying. However, replacement depends on usage frequency and environmental conditions. Replace filters immediately if they show tears, permanent discoloration, or no longer improve suction after washing.
Can I use soap when cleaning my Dyson components?
Avoid using soap on filters as residue reduces filtration effectiveness. However, you can use mild dish soap diluted in water for cleaning plastic components like the dustbin, wand, and attachments. Rinse thoroughly and dry completely before reassembly.
Why does my Dyson still smell bad after cleaning?
Persistent odors usually indicate moisture trapped in components or old debris in hard-to-reach areas. Ensure all washable parts dry completely for 24 hours minimum. Check the brush bar housing and main vacuum head for hidden debris causing the smell.
How do I know if my Dyson battery needs replacement?
Batteries typically last 3-5 years depending on usage and care. Signs of battery failure include dramatically reduced runtime, failure to hold a charge, or the vacuum stopping unexpectedly during use. Contact Dyson support for battery testing and replacement options.
Is it normal for my Dyson to lose suction over time?
Some suction loss is normal as components age, but sudden decreases indicate maintenance needs. Check for clogged filters, full dustbins, blocked airways, or tangled brush bars. Regular maintenance should restore performance to near-original levels.
Related Topics:
Top Dust Mite Allergy Vacuum Recommendations for a Healthier Home