How to Remove Cruiser Bike Fork Quick Method
Removing-the-fork-from-a-Beach-Cruiser-Bicycle
Today, we’re going to show you how to swap out the forks. Sometimes there’s a need to swap it out. So we’ll show you how to do it and it’s actually really simple.
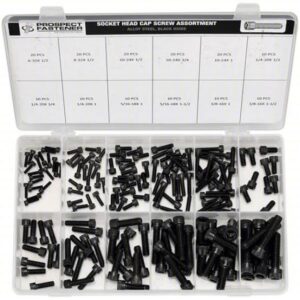
It requires two tools an open-ended box wrench, a pretty large one. This one here is going to be 30 millimeters, which is what most of the urban area.
Tools
At first, you have to need an open-ended box in an open-ended box wrench that large, you can just use a large adjustable wrench, which if you don’t have one, you can pick one up pretty much anywhere.
Then you have to need a six-millimeter Allen wrench.
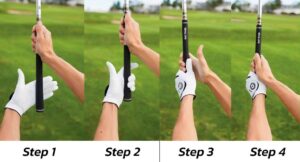
This is what we use for a lot of different parts on the bike. So, first things first, we’re going to go ahead and take off the handlebars.
Adjustment
Use your six-millimeter Allen wrench to the adjustment point here and comes out to lose the area. Slides right out and we’re going to use our 30-millimeter box wrench to remove the fork nut.
When it sets off, we have to put it somewhere safe and then you’ve got a washer in there. This washer is key and what I mean by that is it’s perfectly circular on the inside and we have a small sort of dash that that key it to this and it corresponds to a groove inside the top of the fork.
So that allows it to sit in here without spinning freely. Once it’s in, I’m going to put that guy to the side for now.
So this is important to ride the best cruiser bikes that you have.
Then we’ve got just a hand-adjustable not here. It’s completely circular and you need no tools to get it off and It should already be greased right from the factory and it will slide off nice and easily.
Once again, we’ll pull it and we’ll put it to the side. All of the hard work is done and we usually use a stand here in the shop, but we’re not using one now because obviously at home you probably don’t have one.
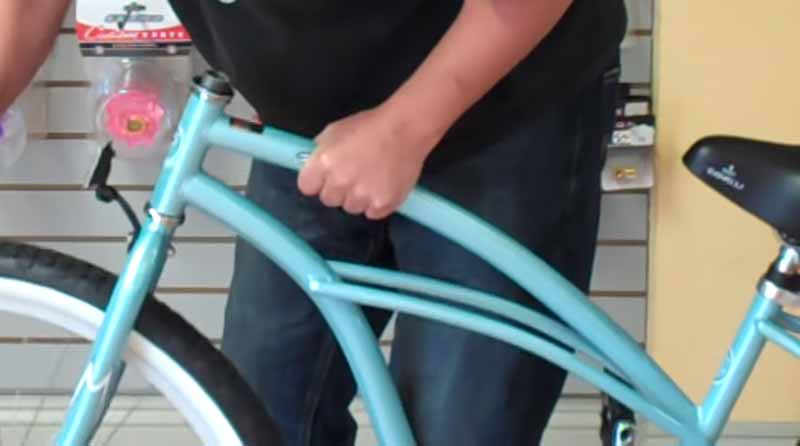
So what we’re going to do is we’re going to lift this out nice and easy. I’m going to lay our fork down.
What you’re going to notice is on the fork. Here is a set of bearings and these bearings, you have to keep safe. They’ll usually stay right on the fork.
Swap the Fork
If you laid it down and then you’ve got the exact same cruiser bike bearing in the top. You’re going to put those to the side. Now in this case we’re not actually going to swap the fork.
We’re just going to put the original cruiser bike fork back on so we put that back on again. We want to make sure that bearings are lined up.
If you have grace then you have to need to throw a little grease in there and this guy slides right on so take bike bearings again. Now the bicycle bearings have two different sides.
They have a flat side where no bearing is exposed and they have around inside where the bearings are exposed.
You want the bicycle bearings to be exposed facing down on the top and facing up on the bottom then put that guy back in there.
Then you have to need to put our hand tightening nut back on them and again if you have a little grease, never hurts to grease this up.
None of this stuff is reverse thread and It’s all lefty loosely righty and tightly to get it apart and now what we want to do is get this just to the point that there’s no longer any play.
We don’t want it to be real tight but when you hold onto the bike frame and you pull the front wheel or the front fork and you don’t want any movement then you want them to be perfectly still.
That’s exactly what we have right here and there’s this there’s no and there’s no play. So now we’re going to take that keyed washer to find where it’s supposed to go drop it down on top.
Then we’re going to get our cruiser bike fork nut and put it right back down here. Why would you use that washer? Because that washer and once we placed this bike fork, nut on here is going to create pressure against our hand and not here and it’s going to make it so it doesn’t move around.
Now, just get this too tight. It’s not a big deal. You can always go back and loosen it. You really want to make sure that there’s no play and at the bike handles and the sorry, the front fork spins freely, sort of tightening that down a little bit more.
To put our handlebars back in tighten it down and we have successfully replaced our fork.
Conclusion
That’s it guys and thank you very much for our article and you want to learn more check OutdoorXsports and hopefully, you have found some amazing biking tips.