
How to Compare Affordable vs Expensive Sonar for Fishing
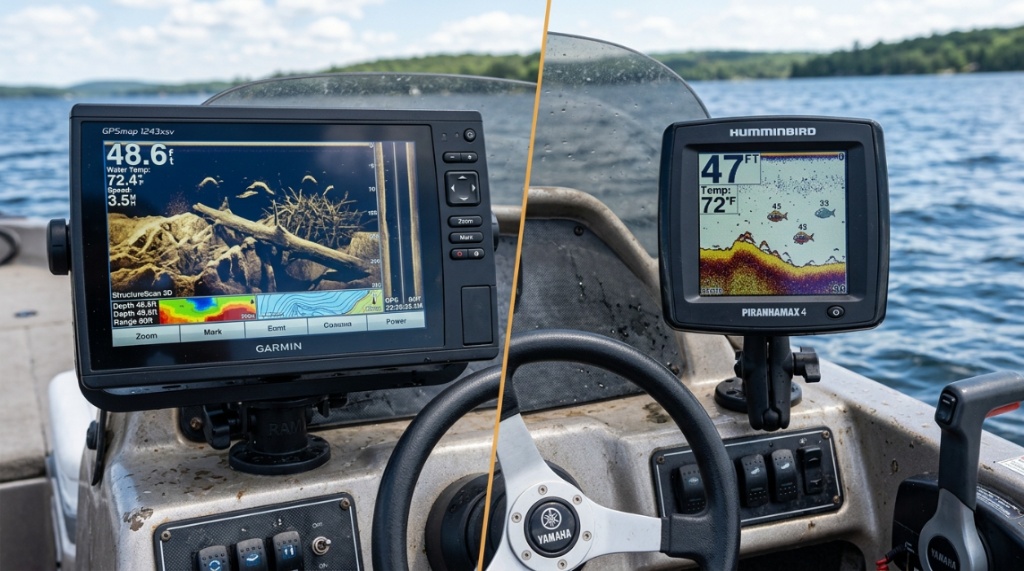
You have the boat ready, the rods are rigged, and you are eager to hit the water. But there is one nagging question. Do you spend $200 on a basic fish finder or drop $2,000 on a high-end unit? This is the core dilemma of choosing between affordable vs. expensive sonar. The truth is, price does not always equal better fishing. An expensive unit with too many features can confuse a beginner, while a cheap unit lacking critical detail can leave experienced anglers guessing. This guide cuts through the marketing hype to help you decide which sonar fits your actual fishing needs, budget, and skill level. We will break down the real differences in technology, screen quality, and usability so you can make a choice you won’t regret.
What Is the Main Difference Between Affordable and Expensive Sonar?
The main difference lies in the level of detail, processing power, and transducer technology. Affordable sonar units, typically under $300, offer basic 2D sonar that shows fish arches and bottom structure. Expensive units, often $800 or more, provide advanced imaging like Down Imaging, Side Imaging, and Live Scope, which offer near-photographic views of underwater environments.
Understanding 2D Sonar vs. Imaging Technologies
Affordable sonar relies almost exclusively on traditional 2D sonar. This uses a cone-shaped beam to send sound waves down. It tells you depth and shows fish as arches. It is effective but requires interpretation. Expensive sonar adds CHIRP (Compressed High-Intensity Radiated Pulse), which sends a sweep of frequencies for clearer target separation. The biggest leap is imaging sonar, which uses a narrow, high-frequency beam that scans the water column like a flashlight in the dark, revealing individual branches, rocks, and fish shapes.
Transducer Capabilities
The transducer is the “engine” of your sonar. Affordable units come with a basic single or dual-frequency transducer. Expensive units include multi-frequency transducers that support CHIRP and imaging. A cheap transducer might struggle to maintain a bottom lock at high speeds, while an expensive one provides clear readings even when you are running and gunning. The physical size and element quality inside the transducer dictate how much detail you see.
Power Output and Depth Capability
Higher price points generally correlate with higher RMS (Root Mean Square) power. Affordable units put out around 200-400 watts, suitable for depths up to 100-200 feet in freshwater. Deep-water anglers targeting fish at 300+ feet or fishing in saltwater need the 500-1000+ watts found in expensive units. More power also helps cut through noise from boat engines and turbulent water.
Why Do Expensive Sonar Units Cost So Much More?
Expensive sonar units cost more because of superior hardware components, advanced software algorithms, and premium displays. The costs are justified by high-resolution screens that are readable in direct sunlight, faster processors that redraw the screen instantly, and advanced signal processing that eliminates interference and false returns.
Screen Quality and Sunlight Readability
A budget unit often has a 3.5 to 5-inch display with a resolution of 240 x 320 pixels. This is fine for basic data but feels cramped. An expensive unit features a 9 to 16-inch screen with 1280×720 HD resolution. More importantly, premium units use IPS (In-Plane Switching) panels with anti-glare coatings. You can see the difference on a sunny day; the budget screen washes out, while the expensive one remains crisp and vibrant.
Processing Speed and GPS Mapping
Cheap units lag. When you scroll around a map or zoom in on a waypoint, you see a checkerboard grid while the unit renders the data. Expensive units use quad-core processors that handle data instantly. Furthermore, high-end units support detailed contour mapping (like C-MAP or Lakemaster) and allow you to create your own high-definition maps while you drive around the lake. This “Quickdraw” mapping capability is a game-changer for finding offshore structure.
How Does Live Sonar Compare to Traditional Sonar?
Live sonar (often called LiveScope or Panoptix) is a real-time, forward-facing sonar that shows fish and structure moving in real time. Traditional sonar shows a historical view of what your boat just passed over. Live sonar allows you to watch your lure sink and see fish react to it, turning fishing into a visual game. This technology is exclusively found in high-end, expensive systems.
The Cost Barrier of Live Sonar
Live sonar systems require specialized transducers that have multiple elements and a dedicated “black box” processor. An affordable sonar setup costs less than the transducer for a live sonar system alone. A full live sonar setup (head unit, transducer, mount, and cables) typically ranges from $1,500 to $3,500. This is the primary reason for the massive price gap between entry-level and professional gear.
When You Actually Need Live Sonar
You need live sonar if you fish for suspended fish like crappie in deep timber or target walleye in vast open water. It is also critical for ice fishing, where you fish vertically. For casual bass fishing in structure near the shore, a good 2D or down imaging unit is perfectly adequate. Do not buy live sonar because of hype; buy it because your specific fishing style demands it.
Which Sonar Features Matter Most for Beginners?
For beginners, the most important features are ease of use, a clear screen, and reliable bottom tracking. You do not need Side Imaging or Live Scope to catch fish. Start with a unit that has a simple menu, a pre-loaded map, and CHIRP sonar. Overcomplicating the setup leads to frustration and wasted time on the water.
Key Budget-Friendly Features
- CHIRP Sonar: Look for a unit with CHIRP technology. It provides much better target separation than standard 2D sonar.
- GPS with Contour Maps: A built-in GPS with a pre-loaded map of your local lake is invaluable. It helps you find drop-offs, points, and humps without guessing.
- Pre-loaded Maps: Ensure the unit comes with maps for your region. Some cheap units require expensive map cards that double the cost.
- Simplified Menu Interface: Touch screens are nice but expensive. A simple button layout with clear icons is better for beginners.
- Portability: If you do not have a dedicated boat, look for a portable kit that includes a battery and suction cup mount.
Features You Can Safely Ignore as a Beginner
You do not need Wi-Fi connectivity, Bluetooth networking, or 3D mapping. These features drain the budget without improving your catch rate when you are learning. Focus on learning how to interpret the basic sonar return. A fish arch is better than a 3D model of a fish if you do not know what you are looking for.
Is a Cheap Sonar Better Than No Sonar at All?
Absolutely. A cheap sonar is infinitely better than no sonar. Having any depth finder eliminates the guesswork of water depth and bottom hardness. Even a basic $100 unit will tell you if you are fishing over mud, sand, or gravel, which is critical for species like walleye and bass. It also helps you avoid running your boat aground.
The Value of Basic Depth Information
Many anglers fish the same spots year after year without knowing the exact depth. A cheap sonar reveals that the “honey hole” is actually 22 feet deep with a rocky bottom. This information allows you to present your bait at the correct depth immediately, increasing your time with bait in the strike zone. Without a sonar, you are fishing blindly.
As you spend long hours scanning the water and evaluating your electronics, ensuring you have the right gear—such as when you pick the right fishing chair for serious anglers will keep you comfortable throughout your trip.
Real-World Limitations of Cheap Sonar
Be aware of the limitations. Cheap sonar struggles in heavy vegetation. It cannot differentiate well between a pike and a log, and the screen might be hard to read in bright sun. You will also get significant interference when running the trolling motor. However, for learning the basics of reading sonar, a cheap unit is a perfect teacher. You can upgrade later once you understand what you are looking for.
Where Should You Spend Your Money When Buying a Sonar?
You should spend your money on the best transducer and the biggest screen you can afford. The transducer is the “engine” of your system, determining how well you see fish. The screen determines how easy it is to interpret that data. Skimping on these two components leads to a poor user experience regardless of other fancy features.
Transducer Quality Over Head Unit Features
Many anglers make the mistake of buying a high-end head unit with a cheap transducer. This is backwards. A Lowrance or Garmin head unit with a cheap transducer will perform worse than a Humminbird with a premium transducer. If you are on a tight budget, buy a mid-range head unit and invest in a high-quality transducer upgrade. You can find detailed breakdowns of specific models in this comprehensive guide on affordable vs. expensive sonar to see which components offer the best value.
Mount and Installation Matter
A good mount is often overlooked. A cheap plastic mount will vibrate at high speed, creating noise on the screen. A solid aluminum or stainless-steel mount keeps the transducer stable. Additionally, ensure you have a proper fuse and wiring harness. A $1,000 sonar unit can be fried by a faulty connection on a $10 battery terminal. Invest in quality installation materials.
Can You Upgrade an Affordable Sonar Later?
Yes, you can upgrade many affordable sonar units, but the options are limited. Most budget units have a fixed transducer that cannot be changed. You can upgrade the software, add a GPS antenna, or purchase map cards. However, you cannot add live sonar to a unit that does not support it from the factory.
Software Updates and Map Packs
Manufacturers like Garmin and Lowrance release free software updates that improve performance and fix bugs. Always update your unit. You can also purchase premium map packs (like LakeVü or C-MAP) that add high-definition contour lines and depth shading. This is a cost-effective way to improve functionality without buying a new unit.
Transducer Upgrades Are Rare
If your affordable unit has a removable transducer cable, you might be able to upgrade to a better transducer. For example, some basic units allow you to replace the 2D transducer with a CHIRP transducer. However, this is rare in the sub-$300 range. Most affordable units are sealed systems. Check the manual before purchasing if you think you will want to upgrade later.
Frequently Asked Questions
How much should I spend on my first fish finder?
For your first fish finder, aim to spend between $150 and $300. This budget gets you a reliable 4-5 inch screen, CHIRP sonar, and basic GPS mapping. This is enough to learn the fundamentals without breaking the bank.
Does expensive sonar guarantee more fish?
No. Expensive sonar gives you better data, but you must interpret that data correctly. A skilled angler with a $200 unit will outfish a novice with a $2,000 unit. The tool is only as good as the user.
What is the best affordable sonar brand?
Garmin and Lowrance offer the best value in the affordable range. Garmin’s Striker series is excellent for simplicity and GPS. Lowrance’s Hook series offers great detail for the price. Humminbird is also solid but often more expensive for equivalent features.
Can I use a cheap sonar in saltwater?
Yes, but with caution. Saltwater corrodes connections quickly. Look for a unit specifically rated for saltwater or invest in a good waterproof cover. Also, cheap sonars have limited power for deep saltwater, so you will only get good readings in shallow bays and flats.
What does CHIRP mean on a fish finder?
CHIRP stands for Compressed High-Intensity Radiated Pulse. Instead of sending out a single frequency, it sends a sweep of frequencies. This provides a much clearer image with better target separation, allowing you to distinguish between a fish and a branch.
Is a portable sonar worth it?
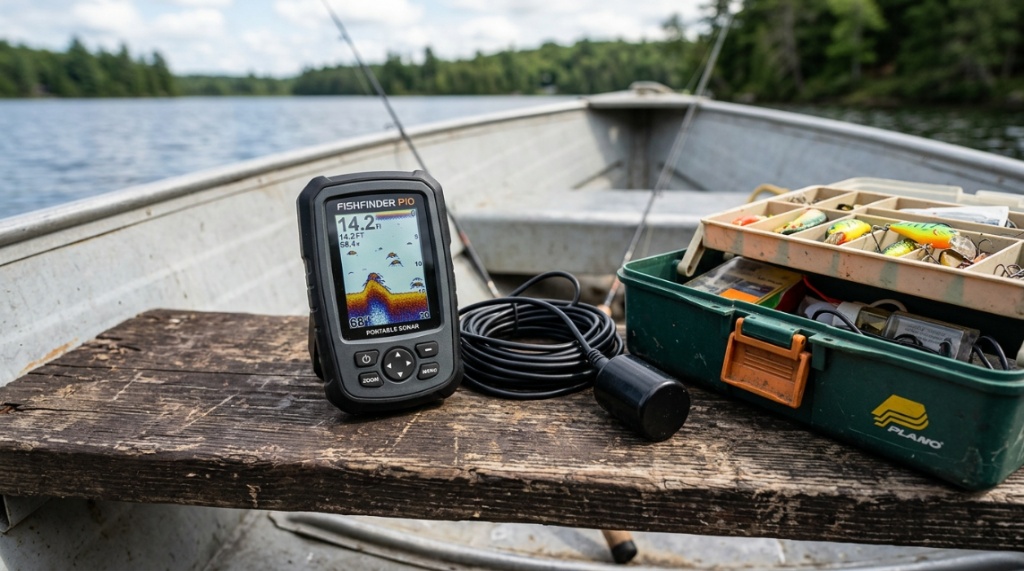
Yes, for kayak anglers or bank fishermen. Portable sonar units come with a battery, a suction cup mount, and a carrying case. They are less powerful than boat-mounted units but are extremely versatile and easy to transport.
How do I know if I need side imaging?
You need side imaging if you frequently fish large areas of structure like weed lines, rock piles, or submerged timber. It shows you what is to the left and right of your boat, covering a wider area quickly. For fishing straight down in deep water, Down Imaging is more useful.
Conclusion
Choosing between affordable and expensive sonar does not have to be overwhelming. Remember the core truth: the best sonar is the one you use and understand. If you are a beginner, a $250 unit with CHIRP and basic GPS will put you ahead of 90% of anglers who rely on luck. If you are a seasoned tournament angler, the premium cost of Live Scope and high-definition screens is a worthwhile investment for gaining a competitive edge. Do not let price tags dictate your decision. Assess your fishing style, your local water depth, and your willingness to learn the technology. Start with what you can afford, master it, and then upgrade when your skills demand it. The fish do not care about the brand of your sonar; they care about whether you find them.