Is the Marcato Atlas 150 for Beginners Easy to Use and Worth Buying?
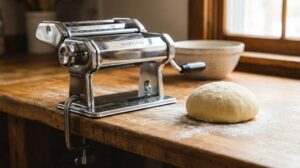
So, you’re thinking about making fresh pasta at home. Maybe you’ve watched a few videos, scrolled through some mouth-watering photos, and now you’re staring at a wall of pasta makers online, wondering which one won’t end up gathering dust in a cupboard. The name you keep seeing is Marcato, specifically the Atlas 150. It’s a classic, but is it the right choice for someone who has never rolled a sheet of dough in their life? The short answer is yes, but let’s dig into the details to see if it truly lives up to the hype for a novice. In this guide, we’ll break down everything you need to know about using the marcato atlas 150 for beginners, from the setup process to the cleaning routine, so you can make an informed decision.
Key Takeaways
- The Marcato Atlas 150 is a manual, hand-cranked machine that offers excellent control and durability, making it ideal for learning the craft of pasta-making.
- Its simple, mechanical design means there are no motors or electronics to fail, making it a long-term, reliable investment if you care for it properly.
- While it takes a bit of elbow grease compared to electric models, the learning curve is short, and most beginners can produce professional-quality pasta after just a few practice sessions.
- The machine is built to last for decades, and you can often find replacement parts, making it a sustainable and cost-effective choice over time.
- A key part of the beginner experience is learning to handle the dough correctly, and the Atlas 150 encourages that hands-on skill development.
Why the Marcato Atlas 150 Is a Staple in Home Kitchens
The Marcato Atlas 150 is not a new, flashy gadget. It has been a fixture in home kitchens since the 1970s, and its enduring popularity is a testament to its quality and functionality. For a beginner, this legacy is reassuring. You are not buying a trendy appliance; you are buying a proven tool. Its construction is entirely metal, from the main body to the gears, which gives it a solid, heavy feel that cheap plastic machines simply cannot match. This stability is crucial when you are rolling dough, as the machine stays firmly planted on your countertop, allowing for consistent pressure and even sheets of pasta.
But the main appeal is its simplicity. There are no buttons, digital screens, or complicated settings. You clamp it to your table, turn the crank, and feed the dough through the rollers. This analog approach might seem outdated in our world of high-tech gadgets, but it actually offers a significant advantage, especially for beginners: full control. You decide the speed of the crank, and you can see and feel exactly what is happening as the dough passes through the rollers. This direct connection to the process is the best way to understand how pasta dough should feel and behave.
The Unboxing and First-Time Setup Experience
When you first get your Atlas 150, you’ll find it comes in a sturdy cardboard box with everything you need to get started. The setup is remarkably straightforward. The machine has a clamp on the bottom that you attach to a stable, flat surface, like a kitchen counter or table. The surface needs to be no more than about 1.5 inches thick for the clamp to grip properly. Once it’s secured, you simply insert the crank handle into the side. That’s it. You’re ready to go. This ease of setup is a huge plus for a beginner, as there is no intimidating assembly process or user manual filled with complicated diagrams.
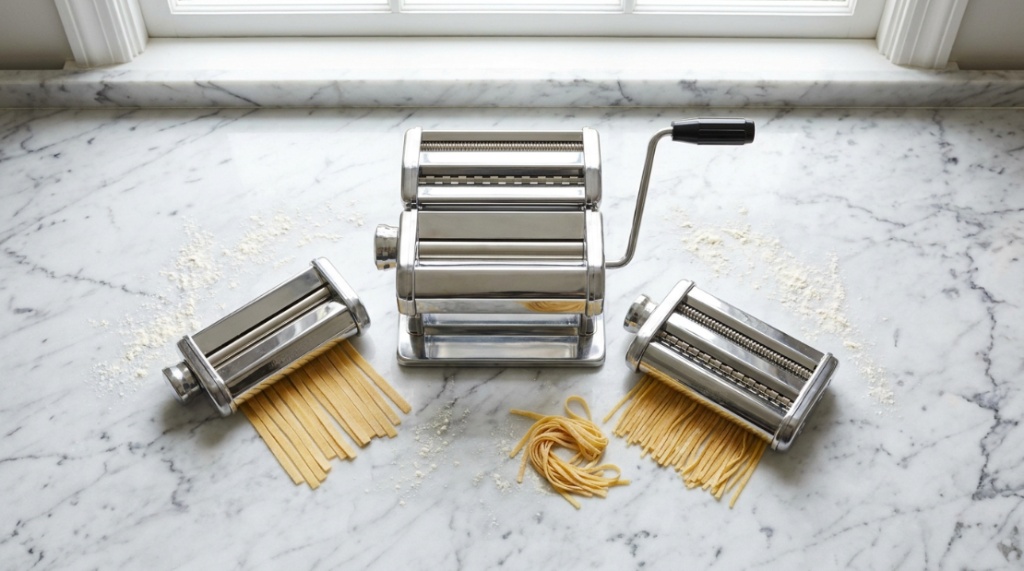
It also comes with a cutter attachment for fettuccine and one for tagliatelle. The cutters are easy to swap out. You unscrew the knob on the side of the machine, slide off the roller section, and slide on the cutter you want to use. This entire process takes less than a minute, making it simple to switch between cutting wide or narrow noodles as you become more confident.
A Beginner’s Step-by-Step Guide to Using the Atlas 150
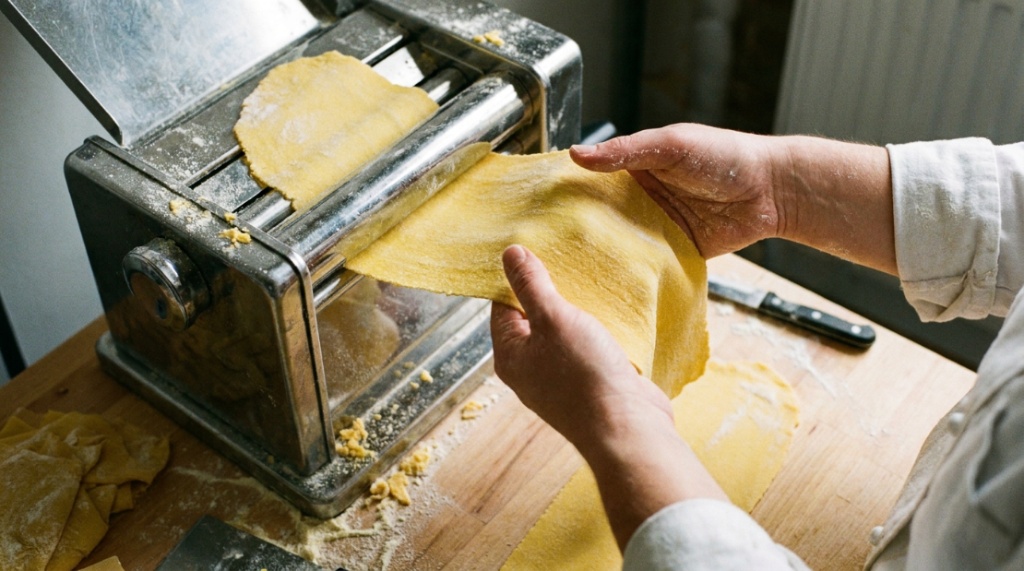
Using the Marcato Atlas 150 is a hands-on process, but it’s not difficult to learn. The key is to understand the steps and practice. Here is a simple breakdown of how it works in practice.
Preparing Your Dough
The success of your pasta starts with the dough. The Atlas 150 is designed to work with a firm, dry dough. A standard recipe of 100 grams of flour to one large egg is a great starting point. The dough should be kneaded until it is smooth and not sticky. If it sticks to your hands, you need to add a little more flour. If it feels like dry sand, you need to add a few drops of water. The dough should feel supple, similar to the texture of Play-Doh. Getting this right is the single most important factor in producing great pasta, and the manual nature of the Atlas 150 will quickly teach you the correct consistency.
Rolling the Dough Sheets
Once your dough has rested for at least 30 minutes, cut it into manageable pieces that you can flatten with your hand to about the thickness of a quarter. Set your machine to the widest setting (typically “0” or “1”). Feed the dough through the rollers while turning the crank. It will come out as a rough, thick sheet. Fold this sheet in half, press it down, and feed it through again on the same setting. Repeat this process of folding and rolling 5-6 times. This is called “lamination” and it develops the gluten in the dough, giving it a wonderful, chewy texture and a smooth surface. This is a critical step that a beginner might otherwise skip, and the Atlas 150 makes it easy to perform.
After lamination, you will begin to thin the dough. Turn the dial to the next setting (usually “2”) and pass the dough through the rollers once, without folding. Continue this process, moving up one number at a time, until you reach your desired thickness. Do not skip settings, as this can cause the dough to tear. For most long-cut pastas like fettuccine, a thickness of “6” or “7” is ideal. The number “9” or “10” is for thin pasta like angel hair or for making ravioli,For a broader look at top-rated kitchen appliances and how other popular models compare in performance, check out our guide on the best pasta maker machine why isiler stands out.
Cutting the Pasta
Now that you have a beautiful, thin sheet of pasta, it’s time to cut it into noodles. Switch the roller attachment for your chosen cutter attachment. Gently feed the edge of the long sheet of pasta into the cutter while turning the crank with the other hand. The machine will pull the dough through and cut it into perfectly uniform strands. As the noodles come out, catch them with your hand to keep them from tangling into a pile. Dust them lightly with flour to prevent sticking.
Common Beginner Mistakes and How to Avoid Them
Every beginner makes a few classic errors when they first start using a manual pasta maker. Knowing about them in advance can save you a lot of frustration.
- Dough is too wet: This is the most common issue. A sticky dough will clog the rollers and make a huge mess. Always err on the side of a drier dough and be prepared to add flour as you roll, especially if the sheet starts to feel tacky.
- Skipping the lamination step: Rushing through the initial kneading in the machine is tempting, but this step is what makes your pasta smooth and strong. Patience here is key to preventing your dough from tearing later.
- Rushing the thickness settings: Moving from a “3” directly to a “6” will likely tear the dough. You must pass it through every setting in between to gradually stretch the dough without breaking it.
- Not dusting the dough: Keep your counter, your dough, and the machine dusted with flour to prevent sticking. Use a good quality flour for dusting, like semolina or all-purpose, not coarse flour which can damage the rollers.
- Stretching the dough while feeding it: Hold the dough sheet lightly as it comes out of the rollers. Pulling it tightly can make it too thin or cause it to tear. Let the machine do the work.
Comparing the Atlas 150 to Other Options on the Market
To understand the value of the Atlas 150, it helps to see how it stacks up against the alternatives. The main competitors for a beginner are other manual makers and the newer electric attachments for stand mixers.
| Feature | Marcato Atlas 150 (Manual) | Generic/Cheaper Manual Maker | Electric Stand Mixer Attachment |
|---|---|---|---|
| Price | Moderate (Mid-Range) | Low (Budget-Friendly) | Moderate to High (Often more expensive) |
| Durability | Excellent. All-metal construction, built to last decades. | Variable. Often features plastic gears that can break. | Good. Metal and plastic, but depends on the brand. |
| Ease of Use | Very easy. Simple, intuitive, manual control. | Easy, but can be less smooth and more fragile. | Extremely easy. Hands-free operation once dough is fed. |
| Control | Complete manual control over rolling speed and feed. | Complete manual control, but mechanisms may be less precise. | Less control. The machine dictates the speed, which can be too fast for thin dough. |
| Cleaning | Very simple. Just brush out flour. No water washing. | Simple, but lower-quality materials may rust or corrode. | More complex. You have to detach from motor, and some parts are not dishwasher-safe. |
| Counter Space | Requires minimal storage space and is lightweight to move. | Similar size, but can feel less sturdy when clamped. | Saves specific space, but requires a stand mixer to be on the counter. |
As you can see from the table, the Atlas 150 hits a sweet spot. It offers the durability and control of a much more expensive, professional machine without the hefty price tag. While an electric attachment offers more convenience, it can often run faster than is ideal for a novice, which increases the chance of tearing the dough. The manual crank of the Atlas 150 forces you to slow down and be deliberate, which leads to better results and a deeper understanding of the process.
Cleaning and Maintenance: What Not to Do
The cleaning process is a major advantage for the Marcato Atlas 150 and a huge relief for beginners. You absolutely must never put this machine in water or the dishwasher. Doing so will ruin it, as the water will get into the gears and cause them to rust. Instead, cleaning is a dry process. After you have finished using your machine, allow any dough remnants to dry and simply brush them off with the small cleaning brush that comes with the machine or a dry pastry brush. You can also use a wooden pick to get any stubborn bits of dough out of the grooves of the cutters.
That’s it. Keeping the machine clean and ready for its next use takes less than a minute. This simplicity is a big deal for a beginner. It removes the fear of a difficult cleanup job that might make you avoid using the machine in the future. The only other maintenance you might need to perform is a light food-grade silicone or mineral oil application on the gears once or twice a year to keep the crank turning smoothly. Do not use vegetable oil, as it can go rancid and become sticky.
Who Is the Atlas 150 Perfect For?
Thinking about your own kitchen habits and cooking style can help you decide if this is the right purchase for you.
- Your perfect match if: You enjoy the process of cooking and want to get hands-on. You are looking for a durable, reliable tool that will last for years. You plan to make pasta somewhat regularly, not just for special occasions. You appreciate tools that are simple to use, store, and clean.
- Not the best fit if: You are looking for maximum convenience and want a hands-free experience. You have physical limitations that make hand-cranking difficult. You prefer to make small batches quickly without the physical effort. In that case, you would be better served by an electric model.
The Atlas 150 is perfect for the home cook who wants to not just eat good pasta, but to learn the craft of making it. It is not an appliance that does the work for you; it is a tool that you use to create something wonderful.
Is It a Good Investment for a Novice Cook?
The question of “worth” comes down to how often you will use it and what you value in a kitchen tool. If you are a novice who is just curious and not sure you will stick with it, the initial price might seem like a barrier compared to a cheap, plastic version. However, a cheap model is more likely to break, provide uneven results, and ultimately frustrate you, driving you away from the hobby altogether. In this way, the Atlas 150 is a much better “beginner” machine. It eliminates poor equipment as a variable for failure.
Its robust construction means it is an heirloom quality purchase. It can be passed down or sold later. Look at the lifespan of the product. An argument can be made that it is more economical to buy a more expensive, durable machine once than to buy a cheap one three times over ten years. The skill you learn and the consistent, fantastic results you produce make it a worthwhile investment in your culinary education.
Our Verdict on the Marcato Atlas 150
After evaluating its design, usability, and build quality, it is clear why the Atlas 150 has remained a top seller for decades. For a beginner, it is arguably the best possible tool you can start with. Its forgiving learning curve, hands-on nature, and forgiving manual operation are perfectly aligned with the needs of someone who is just starting out. It teaches you how the dough should look and feel at every stage, an understanding that is essential for mastering fresh pasta.
There is a reason you see this specific machine in the homes of nonna and professional chefs alike: it simply works. For its price point, it offers durability and performance that far outpaces anything else in its class. Will it stay on your wishlist, or will it become a permanent resident on your kitchen counter?
Frequently Asked Questions
Is hand-cranking the pasta maker difficult?
No, with the proper dough consistency, it is quite easy. The gears provide enough leverage that rolling out a sheet of dough takes very little effort. The process becomes more tiring when the dough is too wet or sticky, so focusing on your dough recipe is the best way to make the cranking easy.
Can the Marcato Atlas 150 make different shapes of pasta?
Out of the box, it can make two types of flat pasta: fettuccine and tagliatelle. You can use the flat sheets to make other shapes by hand, such as lasagna, ravioli, or tortellini. Marcato also sells many additional cutter attachments, such as pappardelle and linguine, that you can purchase separately to expand your options.
What kind of flour is best to use with this machine?
You can use a variety of flours, but ‘00’ flour, which is finely ground and high in protein, is the classic choice in Italy and produces a silky, tender dough. All-purpose flour also works very well and is more accessible. You can even mix in a bit of semolina flour for a more rustic, slightly chewier texture.
How do I stop the pasta from sticking together after cutting?
Dust your rolled-out sheets of dough lightly with flour before feeding them through the cutting rollers. After cutting, immediately toss the noodles with a little more flour, gather them into loose nests, and let them dry on a floured surface for about 10-15 minutes before cooking or storing.
Conclusion
The Marcato Atlas 150 is not just easy to use; it is the ideal teacher for any beginner. It rewards care and patience with consistently excellent results, building your confidence and skill from your very first batch. While it requires a little more physical effort than an electric model, the superior control and quality of the finished pasta are more than worth it. In a world of disposable kitchen gadgets, the Atlas 150 is a precision tool built to last a lifetime, making it a smart, satisfying, and worthwhile purchase for anyone serious about learning to make great pasta at home.
Its timeless design and proven performance make it a reliable kitchen companion. Whether you are making a simple weeknight dinner or an elaborate weekend feast, this pasta maker will not let you down. Take the plunge, and you will be rewarded with the delicious, unmatched taste of fresh, homemade pasta.